
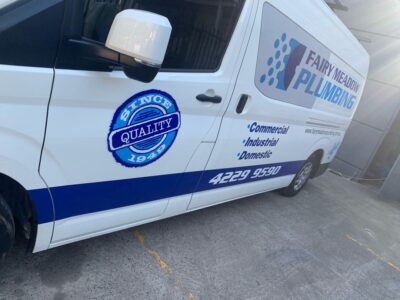
Decals, bumper stickers, advertising signage are the most common types of signage removed on cars. While they are a great way to personalise your vehicle at the time, but when it comes to selling your car or passing it over to a new owner, you can really end up with a mess when it to comes to car signage removal. With heat, it is an excellent way to remove car stickers and along with all the sticky residue that gets left behind.
Stay tuned as we breakdown how you can make easy work of car signage removal without causing damage to your car’s paint. Although there are a wide variety of products that can help remove the adhesive glue and decals, not all of them can leave your vehicle’s paint unscathed. So do follow these steps carefully to ensure that your car’s paint stays protected.
PREPARATION: Wash and Clean – Decontaminate your Car
There are things to consider when removing car signage. There are dust, dirt and debris around the sticker that can cause scratches when you are trying to remove the sticker and any residual adhesive. So, you would want to wash and rinse any loose dirt beforehand with a car wash shampoo diluted with the correct amount of water. Make sure you use a car wash shampoo safe for your paintwork (pH neutral shampoo may work best), as other detergents can be too harmful for automotive paint and can damage it. Make sure to use a hose, or better yet, a pressure washer/gerni to ensure that any excess car shampoo is thoroughly rinsed off. Lastly, let the area dry completely before moving on to the next step using a Microfibre Towel.
Using Heat
Using heat for signage removal can be a fast and easy way to get the job done effectively. Two of the most useful tools for this are heat guns and steamers. Heat guns work by blowing targeted, heated air and steamers work along the same principle only that they blow targeted steam rather than just air. When using either of these tools using proper technique is key. Apply the heat at the right angle as this will help prevent damage to the paint as well as keeping you from burning your finger. Also, always remember to wear glasses and gloves for safety while you work.
Peeling Away the Signage
It’s important to do this gently. The application of heat will have loosened and broken down the adhesive on the backside of the signage, making it feel soft and stretchy. However, the adhesive is still present. Peeling the signage off as gently as possible will help to prevent damage to the vehicle’s paint. Go nice and slow as yanking will damage the paint and leave more residue behind, also makes the whole process longer. So, slow and steady is the way to go with this step. If you have cracked signage, this will make it harder to treat as brittle signage will often break into smaller pieces rather than come off as a single piece.
Glue & Adhesive Removal
Removing the signage can be an easy task at times, but what can really turn things on its head, is when you come across really sticky and strong glue/adhesive. Even with the use of heat or a steam gun, sometimes the glue will not budge. Unfortunately, there is no way of knowing in advance whether you will have strong glue or not until you have dived right into it. The glue also can vary from certain panels of the vehicle. Some parts glue may come out easier than other areas, a real head-scratcher at times.
This is where the use of stronger chemicals will be used to loosen and ‘melt’ the glue. However, if your car has no clear coat or paint protection, you are at a heavy risk of the paint getting stripped off and can be almost unavoidable – there is always this degree of risk. Although a rare occurrence, this is more prone to cars without a clear coat, particularly old utility commercial vehicles such as the Hiace or Hilux (old models). ,
How to Use a Clay Bar
You can use a clay bar all over your vehicle. However, if you want to use a clay bar just to remove and repair residue and discoloration from signage, you can do that without doing the rest of the car. First, you will need to spray lubrication liberally to the area you are cleaning. Once that is done, you will want to take the clay bar and move it lightly up and down over the space being treated. After the clay bar has been applied, wipe it down and buff it a little with a soft, microfiber cloth or rinse off with water followed by drying with a towel. Car wash shampoo or a detailer spray can be an effective lubricant to use alternatively, just as every Professional Car Detailer recommends, never use any non-automotive designed products such as dishwashing liquid as it can be highly abrasive. As the clay bar collects contamination, simply fold and knead the bar like bread or playdough to reveal a new clean side again to use. You don’t need to apply too much pressure on the bar, just simply let it work its way in through each passing stride. Just a little elbow grease and patience, the decontamination phase will be effectively carried out.
Machine polished and buffed
After using the clay bar, it’s a good idea to get the vehicle machine polished and buffed after you have removed signage and residue. As always, if you can, do perform this step in the shade or away from direct sunlight to reduce the amount of heat collected on the surface. Polishing the car under the sun with high temperatures can be a real pain.
By machine polishing, this will smoothen out and rejuvenate the condition of the paint that has been washed. If you have your own polisher and buffer machine you can use that, just be certain to know which combination of compounds and pads to use for optimal results or you could risk marring the paint. If you don’t have access to one, you assign the task to a professional auto detailer.
We always recommend a machine polish and buff, as this can help blend in the paintwork as not doing so is like the difference between day and night. You will most likely notice the imprint of the signage left behind as it has been exposed to UV and harmful sun rays to a less extent, like removing a band-aid from your skin. A machine buff will help to match the paint but cannot guarantee 100% complete removal of oxidation (depending on how long the signage has been on for). Also recommended, is to apply a layer of wax or a paint sealant (or those looking for the best – a ceramic coating) to protect the paint after you have polished the surface by machine.
All Cars Are Different
Just note that the time taken to remove car signage, stickers, decals and so on, will vary from vehicle to vehicle, depending on the type of adhesive and how long it has been there for. For these matters, it may just take extra time due to extra heating required to remove and melt the adhesive.
So, there you have it. Car signage removal made easy! If you prefer a professional to perform this task for you, considering that the machine buff and polish can be quite a meticulous process, you can always contact Schmicko to have this organized for you. We will arrive fully equipped and ready to restore that shine and gloss back to your paintwork.
Can Car Signage Always Be Removed?
Short answer, no. Which also explains why the result will often vary from car to car. All have been exposed to varying conditions. First of all, we don’t know what type of glue was used, the quality of the signage, how sun damaged the signage is, whether the glue is still soft or etched and so on. All of these varying factors will determine the result let alone, if the car can be treated. If you notice cracking and peeling, then this will make the situation a lot more difficult to address. Instead of removing signage as a large sheet, imagine picking it off piece by piece like a jigsaw puzzle.
Looking to have tints installed in your car?
If you enjoyed this read and wanted to arrange your car to have its windows tinted at the comfort of your own home or workplace, then just reach out today.
Hi, I’m Chester
author, Automotive Service writer

As a seasoned author on our team, Chester also known as ‘Gadget’, for his love for all things mechanical, brings a wealth of experience and expertise to the table, particularly when it comes to automotive topics.